How to Clean iPhone Microphone: If you are an iPhone user and facing issues on a call like you are not able to hear the voice properly then you have to clean the iPhone microphone. If you don’t know the steps to clean it then you don’t need to worry about it here in this article, we are going to share a detailed guide about how to clean an iPhone microphone. So, simply read this article till the end to understand all the steps properly.
How to Clean iPhone Microphone?
If you are interested to know the steps and methods and want to get a proper guide about how to clean iPhone microphones then you have to read this article till the end. Keep reading this whole article to know all the details properly.
Test and Inspect Your iPhone’s Microphone
First of all, if your iPhone microphone stops working then you have to confirm it by using different apps. It is because the iPhone is having three microphones where one is on the back for recording video audio, the other one is at the bottom for speakerphone calls and one is for voice recordings and one is in the earpiece for phone calls.
How Do I Test The Microphones On My iPhone?
In terms to test the front and rear microphones, you have to shoot two videos. One is by using the front camera and one is using the rear camera and then simply playing them back. If you hear the audio in the videos then the video’s microphone is working properly.
To test the bottom microphone, you need to launch the voice memos app and then simply record a new memo by clicking on the large red button which appears at the centre of the display.
Close Any Apps That Have Access To Microphone
It is also possible that an app which is having access to the microphone is creating the issue. That app may get crashed or the microphone may be active in the app. You can simply be able to see which apps is having access to the microphone by simply entering settings > privacy > microphone.
You have to open the app switcher to simply close your apps and if your iPhone is having the Face Id then simply swipe up from the bottom of the display to the centre of the screen. If your phone doesn’t have the face ID then you are required to double-click on the home button and then simply swipe your apps up and off the top of the display.
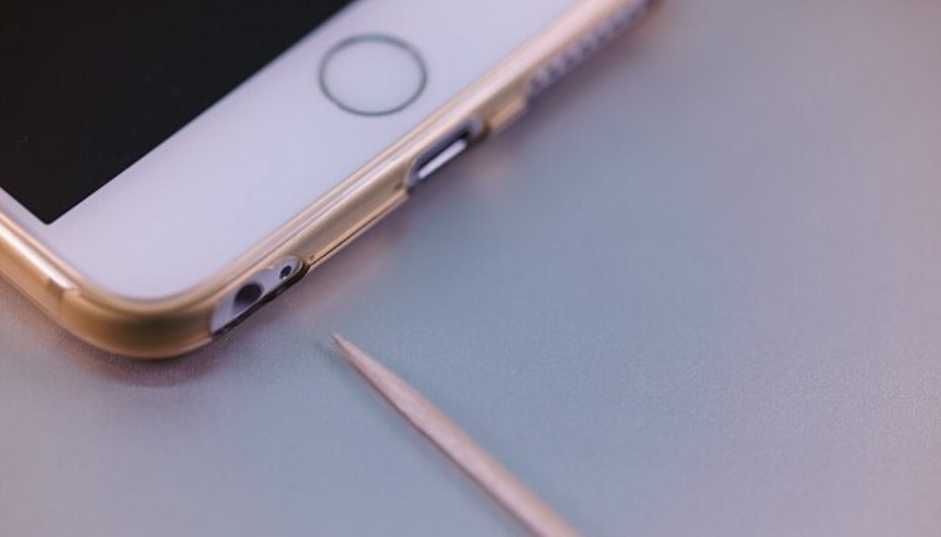
Clean The Microphone
If you find out that one of your iPhone microphone sounds will get muffled after testing or is doesn’t have the sound at all then you have to clean them. One of the simple methods to clean the iPhone microphone is by simply using a dry or unused toothbrush to clean the microphone grill from the bottom of the iPhone and the small black dot microphone to the right of the rear-facing camera. You are required to slide the toothbrush on the microphone to simply dislodge any of the stuck pocket lint and dust as well.
You can also be able to use compressed air to simply clean the microphone of the iPhone. You need to ensure to spray gently and far away from the microphone a swell. You need to know that compressed air will damage the microphone if it gets sprayed too close proximity. Ensure to test the iPhone microphone again after cleaning.
Also Read:
- How to Download Reddit++ IPA?
- How to Install iAndroid On iOS?
- How to Download Rocket For Instagram IPA?
- How to Fix Pokemon Go GPS Not Found?
Final Verdict
So, by reading this whole article, you will easily be able to understand the complete steps about how to clean iPhone microphone. We hope that this How to clean iphone microphone and speaker article is useful and helpful for you and helps you to know all the steps to fix this issue. If yes then do share this article with others so that they can be able to take the benefits from this article.